How Do You Transcribe a Recording?
There are many reasons why some people need to transcribe a recording. Perhaps, they need to convert the lyrics of a song, the soundtrack of a movie or an essential phone call.
Switching over from hand-transcribing an audio to using a transcription service may let you get a quick text version of your audio files. Besides, you'll have less work and more time for creative efforts. Transcript will give you completely accurate data. You will spend less energy, time, and money and will get more accurate audio to text transcripts.
Transcription apps for Android and iOS
1. TranscribeMe
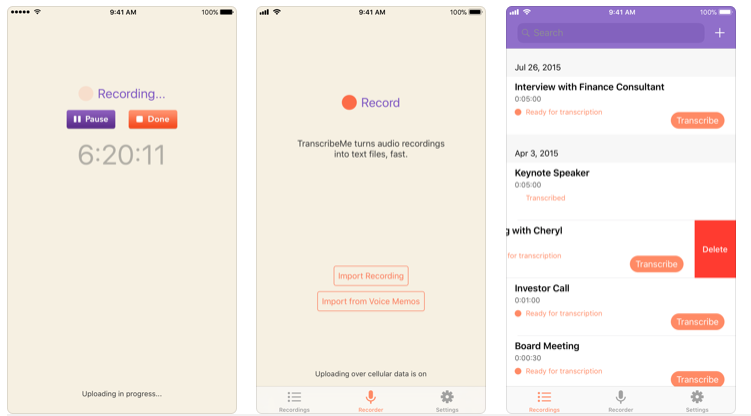
TranscribeMe is one of the best and most popular transcribing apps. It doesn't matter whether you're a student or a businessman; the app is affordable for everybody. To start using the app, you need to create an account. The app allows you to log in using either your Google account or Facebook. This means that you don't need to remember one more password. Besides, the developers promise us 98-100% accuracy of transcription. The app is available on the AppStore and Google Play.
2. Temi
The second app on this list is Temi, and like the previous service, it's free to install and charges money for time-limited transcription. In particular, it costs $0.10 p/min. This means that for an hour you'll pay $6.00. As for the extra features, the app highlights the text it might have transcribed incorrectly. This additional feature helps you easily detect any potential mistakes. You can correct those mistakes later with the help of the app's editing feature. This is very important because the app comes with no human-based transcription services.
AppStoreGoogle Play3. REKK - Call Recorder
Another good speech-to-text app is REKK – Call Recorder. This app was initially designed to record phone calls on iPhone, but it has also a transcription feature, so the app will allow you to record all your outgoing and incoming phone calls and convert them to text. After transcription, you'll be able to search for the necessary information in the transcribed text. Besides, REKK can share your files via 3rd-party messengers, create backup copies of your recordings and save the locations where you made your calls. The app has 2 versions – the usual one that charges weekly, monthly or annual fees and the PRO version. Find the app on the AppStore and chose the most convenient option for you.
4. Voicea
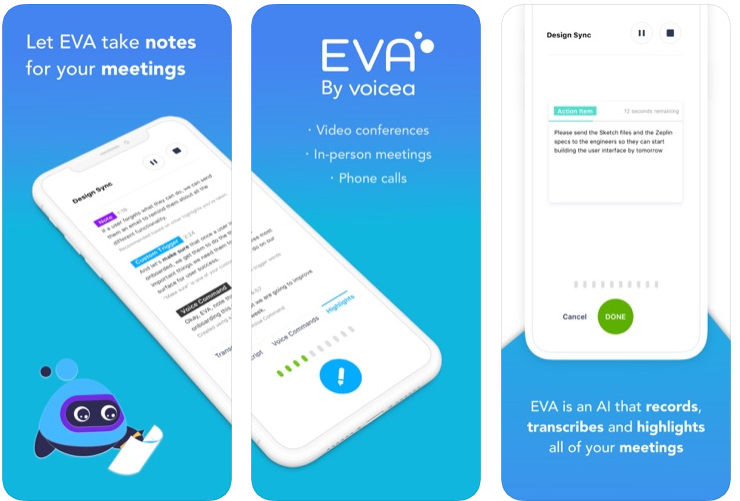
Voicea is an easy-to-use transcription app. You need to create an account if you want to transcribe audio using this app. You can use login credentials from Office365, Google, Slack, or Salesforce. Voicea offers calendar feature giving you an opportunity to set notifications of any future events like movies that you want to transcribe and record, songs and lectures. Unfortunately, the app won't allow you to import files from other apps like Voice Memos. Consequently, the app won't meet all your needs in cases when you need to convert audio files received from a friend.
How can I transcribe a recording on Mac or Windows OS?
Thankfully, everybody can transcribe audio and convert it to text using Google Docs. The tool that helps you do it is called Voice Typing (it is pre-installed). It's easy to understand how the tool works: when you speak, it listens to you and transcribes your speech into a Google Doc. Let's take a look at the step-by-step guide:
1. Make sure that it's quiet
Note that Voice Typing can't convert an audio file played via a speaker: the tool needs to hear your voice in a silent area. If there's a crowd of people talking to one another, you won't get an accurate transcription.
2. Open an empty Google Document
Go to the Google Doc home page, and select "start a new document."
3. Open the Voice Typing feature
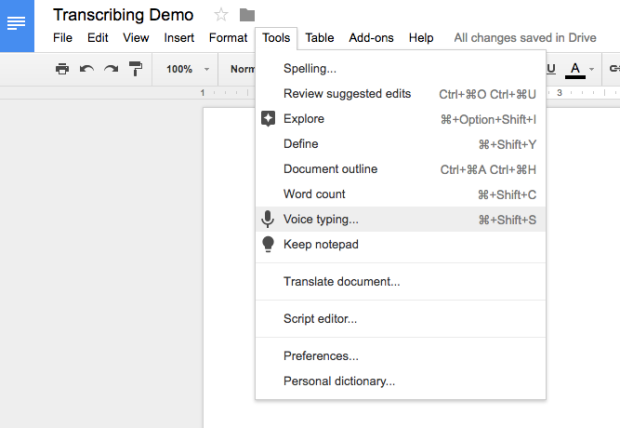
Under the "Tools" dropdown menu, choose "Voice Typing" or use the hotkeys Command+Shift+S to open the Voice Typing tool.
4. Make sure that the speech-to-text button shows up
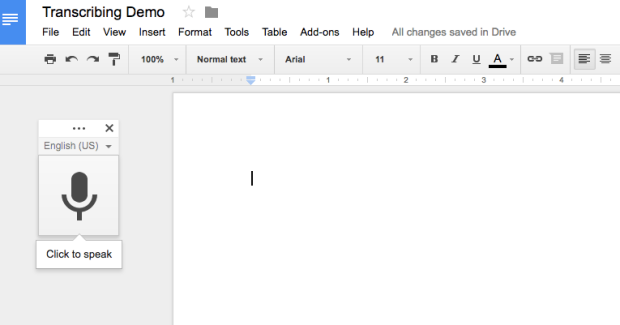
After you select "Voice Typing," the big button will show up on the left side of your document.
6. Make sure your mic functions and the right language is selected
To use voice typing feature, your mic must be on and working. Gadgets and mics vary, so check your computer guide for instructions. Mic settings are usually in the System Preferences on a Mac, or the Control Panel on a PC.
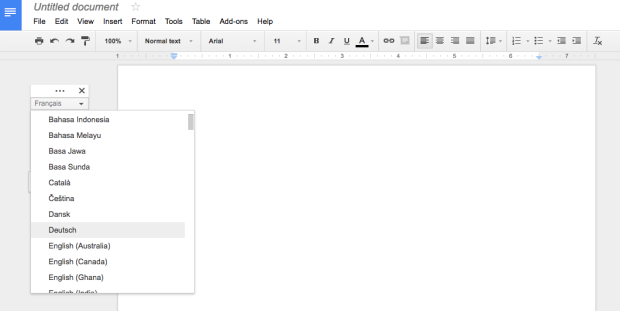
Voice Typing works with a lot of languages and many dialects and accents (for example, the feature offers over 20 versions for Spanish).
7. Click the big round button to start recording
You need to click the recording button to start transcribing. The mic icon will turn red to show the feature is active. Note that you mustn't close the window with the doc while you are speaking. Otherwise, the feature won't transcribe. Speak clearly and slowly, at a normal tone. If you begin speaking very quickly, the final text will be inaccurate.
6. Watch along as you transcribe
Don't forget to watch along as your voice is being transcribed. If the service stops listening to you while you're speaking, just click the big round button to turn it off and turn it on again.